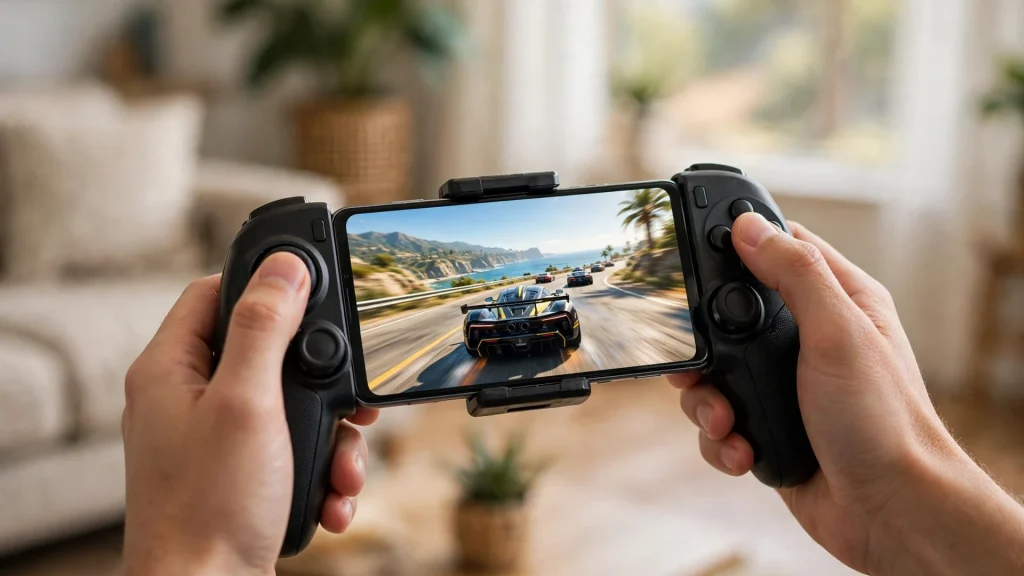
Touch controls will get you through menus and slow strategy games, but the moment you try a platformer, a racer, or any action title in GameHub Lite, you will feel their limits. A real gamepad changes everything: precise movement, comfortable triggers, and controls that feel like the game was designed for them. The good news is that setting one up takes about ten minutes.
This guide covers the whole process: which controllers work, how to pair them with your Android phone, how to map buttons inside GameHub Lite, and how to fix the problems people hit most often.
Which Controllers Work With GameHub Lite
GameHub Lite uses Android’s standard controller support, so most modern gamepads work. Your options:
- Bluetooth gamepads. The most popular choice. Xbox-style and PlayStation-style wireless controllers pair directly with Android and work well. Most third-party Bluetooth controllers designed for mobile gaming work too.
- Wired controllers via USB OTG. If your phone supports USB On-The-Go, a wired controller connected through an OTG adapter is rock solid. No batteries, no wireless lag.
- Telescopic mobile controllers. These clamp around your phone like a handheld console. They connect over Bluetooth or USB-C and are excellent for long sessions.
- Older controllers with adapters. Many can be made to work, but expect more fiddling. If you are buying new, stick with a current Bluetooth model.
Avoid no-name controllers with no reviews. They often have poor Bluetooth implementations, sticky buttons, or input lag that no settings can fix.
Step 1: Pair Your Controller With Android
Do this before you open GameHub Lite. The app can only use a controller that Android already recognizes.
- Put your controller into pairing mode. On most controllers this means holding the pair or share button until a light blinks.
- On your phone, go to Settings > Connected devices > Pair new device (the exact path varies by phone).
- Select your controller from the list and confirm the pairing.
- Test it: the controller’s light should go solid, and Android should list it as connected.
- Optional but smart: open any Android game or a free controller tester app and confirm buttons and sticks respond. If they do not work here, they will not work in GameHub Lite either.
Step 2: Map Buttons Inside GameHub Lite
With the controller paired and working in Android, open GameHub Lite and set up the mapping:
- Connect the controller before launching your game. Some games only detect input devices at startup.
- Open the game’s settings or the app’s controller and input section.
- Enable gamepad input if there is a toggle for it.
- Open the button mapping screen. You will see a list of game actions next to empty or default slots.
- Tap an action, then press the controller button you want for it. Work through every action the game needs.
- Map the analog sticks to movement and camera. Set a comfortable dead zone so slight stick drift does not move your character.
- Map the menu, pause, and overlay buttons too. You will need a way to open menus without touching the screen.
- Save the profile. Name it after the game if the app allows per-game profiles, so different games can have different layouts.
Take your time here. A careful five-minute mapping session pays off in every hour you play afterward.
Sample Layouts for Common Game Types
- Racing games. Triggers for accelerate and brake give you analog control. Map handbrake to a bumper and camera controls to the right stick.
- Shooters. Right trigger to fire, left trigger to aim, bumpers for weapon switch and reload.
- Platformers. D-pad or left stick for movement (try both and keep what feels better), a face button for jump, and another for attack or dash.
- RPGs and strategy. These are menu heavy, so prioritize comfortable menu navigation: D-pad for menus, face buttons for confirm and cancel, and triggers for tab switching.
- Fighting games. D-pad usually beats the analog stick for clean inputs. Map all attack buttons to the face buttons and keep it simple.
Step 3: Tune Sensitivity and Dead Zones
- Increase the dead zone if your character drifts when you are not touching the stick.
- Lower sensitivity if aiming or camera movement feels too fast. Raise it if turning feels sluggish.
- Test in a safe area of the game, not in the middle of a boss fight.
- Save separate profiles for games that want very different feels, like a twitchy shooter versus a relaxed RPG.
Common Controller Problems and Fixes
The controller pairs but GameHub Lite does not see it
Close the game completely, confirm the controller is connected in Android settings, then relaunch the game with the controller already connected. Detection usually happens at launch. If it still fails, restart your phone with the controller paired.
Buttons work but the mapping is wrong
You probably mapped against a different layout than the game expects, or loaded a profile made for another title. Open the mapping screen and redo it for the current game, then save it under that game’s name.
Input lag or delayed response
Wireless interference is the usual cause. Move away from crowded Wi-Fi environments if you can, keep the phone close to the controller, and disconnect other Bluetooth devices you are not using. If lag persists, try a wired USB OTG connection. Also check that battery saver is off.
Double inputs (one press registers twice)
This usually means both the app’s mapping and Android’s system-level mapping are active at once. Check for duplicate mappings in the app’s settings and disable any system-level gamepad remapping tools running in the background.
The controller disconnects mid-game
Low controller battery is the top cause, so charge it. Next, check your phone’s battery optimization settings: if Android is aggressively sleeping Bluetooth to save power, exempt your controller or disable the optimization during play.
Touch Controls vs Controller: When to Use Each
- Use the controller for action games, platformers, racers, shooters, and anything with real-time movement.
- Use touch for point-and-click adventures, turn-based strategy, and management sims, where tapping menus is faster.
- Combine them when it helps. There is no rule against using the controller for gameplay and tapping the screen for inventory menus.
Conclusion
A gamepad is the single biggest upgrade you can make to GameHub Lite. Pair it with Android first, map it carefully inside the app, tune the sticks to your taste, and save per-game profiles. Ten minutes of setup turns clumsy touch controls into the precise, comfortable experience these games were designed for.
Read next: